Empowering organizations with innovative, game-based eLearning solutions tailored to enhance workforce capabilities. Discover our comprehensive training modules designed for dynamic and effective learning experiences.
1
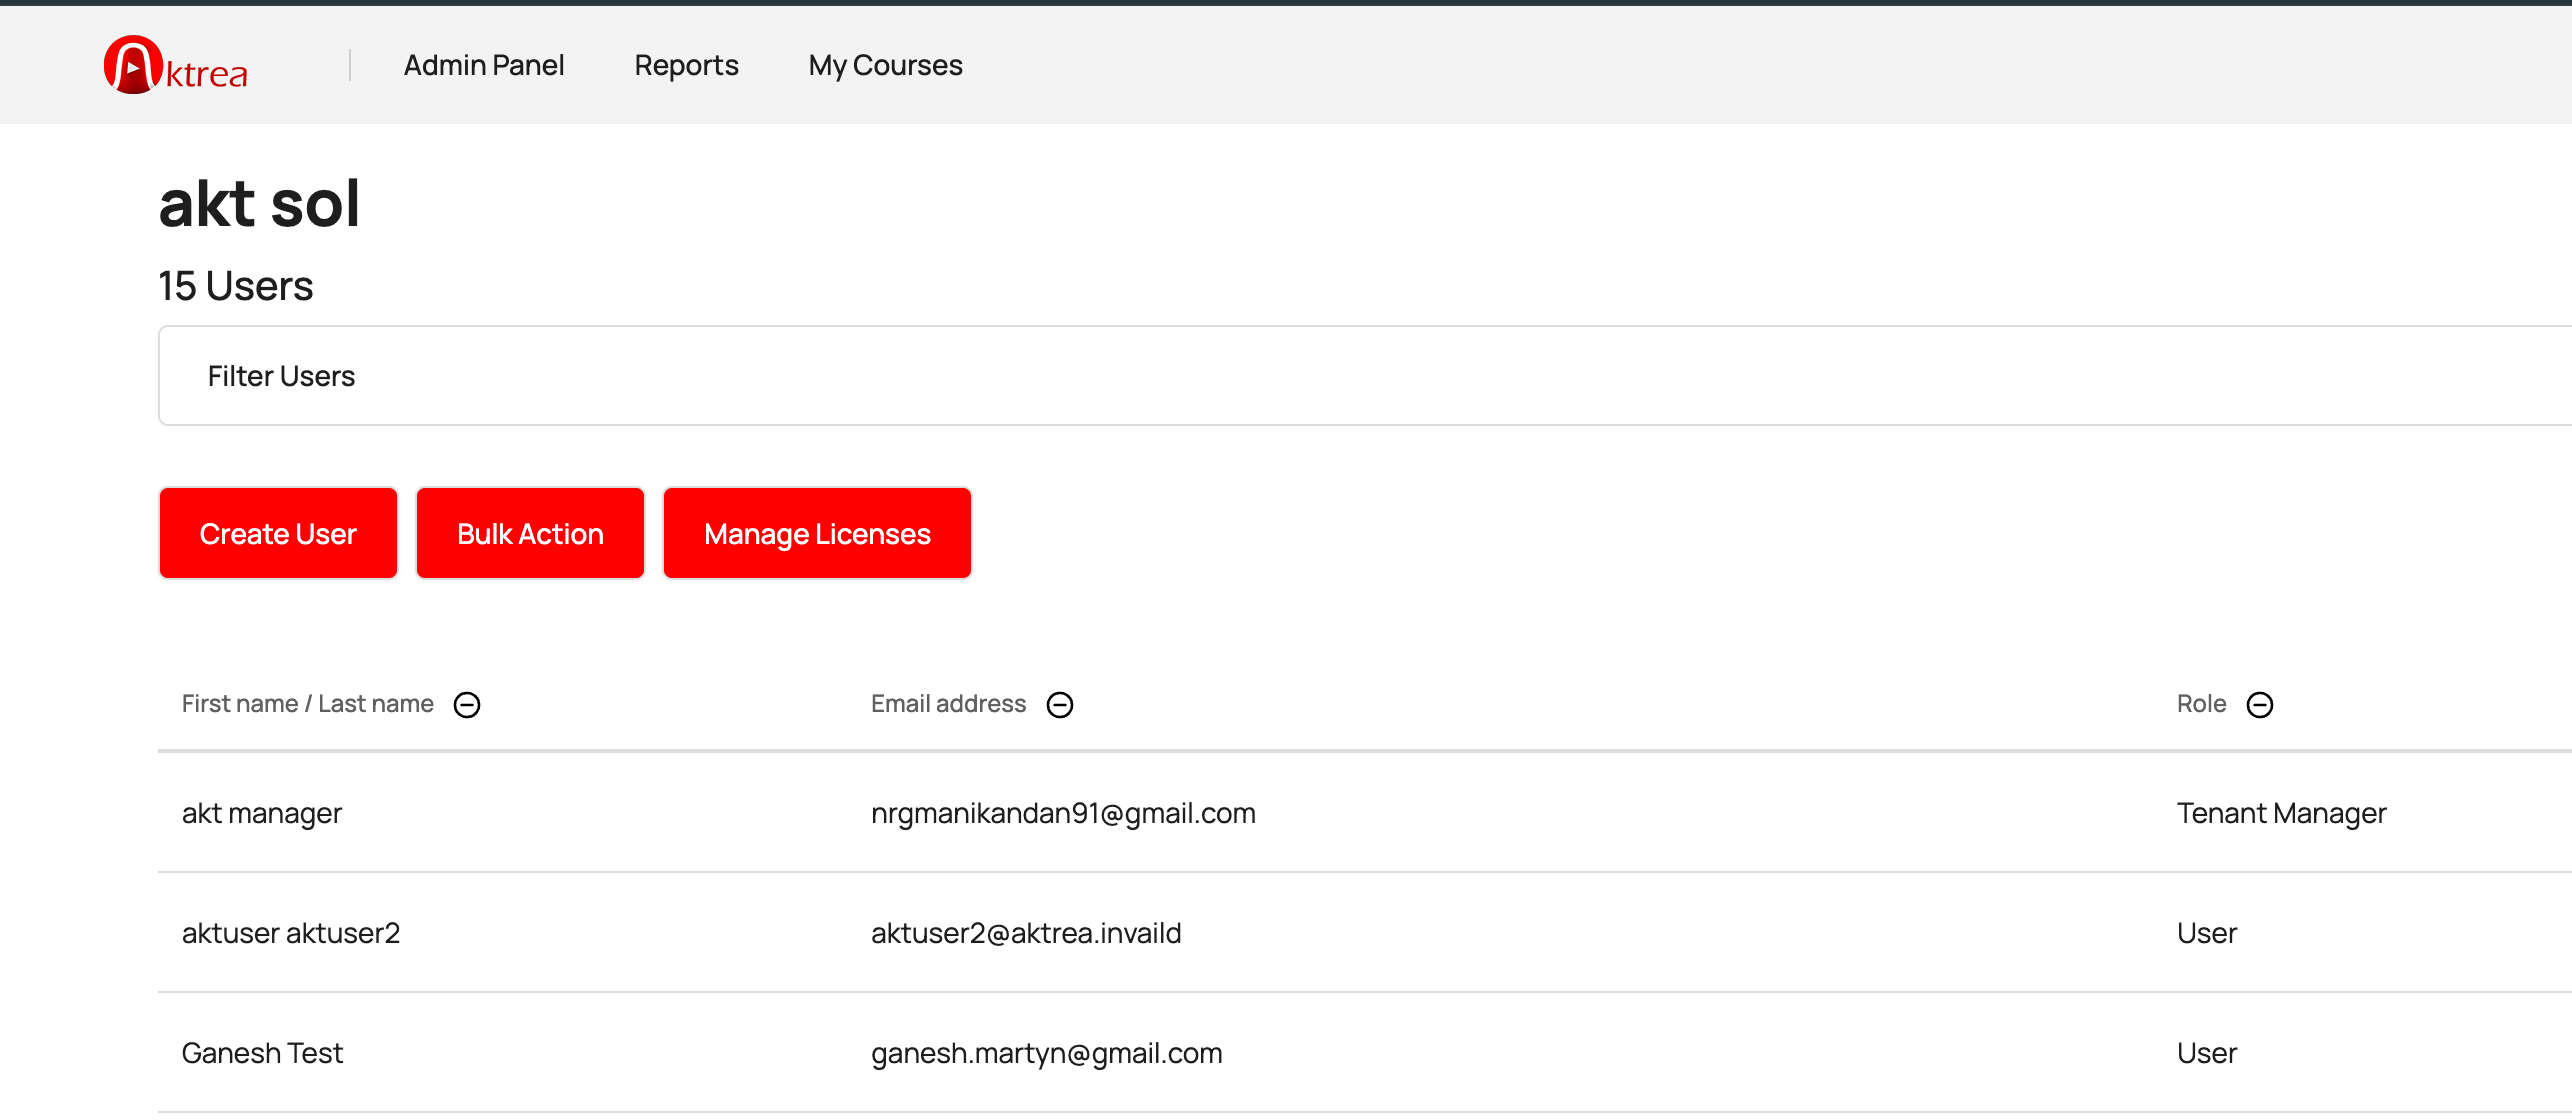
Admin Panel
Manage users (create, delete, assign licenses).
2
Create User
Create new user accounts and assign them to available licenses for course access.
3
Bulk Actions:
- Upload a file to create multiple user accounts and assign licenses.
- Update existing user information and assign new licenses in bulk.
- Delete multiple user accounts simultaneously.
4
Manage Licenses
- Assign or unassign licenses to individual users. Monitor the number of utilized licenses.

1
User Details
Fill in the required fields – First name, Last name, Email address & password – alpha-numeric (example: RQE4FHL)
2
Username
Turn on the toggle for “Use email address as username.” It is important to enable this setting, or the system will automatically use only the first part of the email as the username. For example, user1@aktrea.com will be taken as just “user1” in the username.
3
License
Select the available licenses
4
Course
Select the course under the license
5
Create User
Click on Submit and back to the dashboard
6
Password
- New password: Enter the password
- Force password change: Off
- Send temporary password by email: Disabled
If you want to send an auto-generated password via email, follow these steps:
- New password: Empty
- Force password change: On
- Send temporary password by email: Yes
1
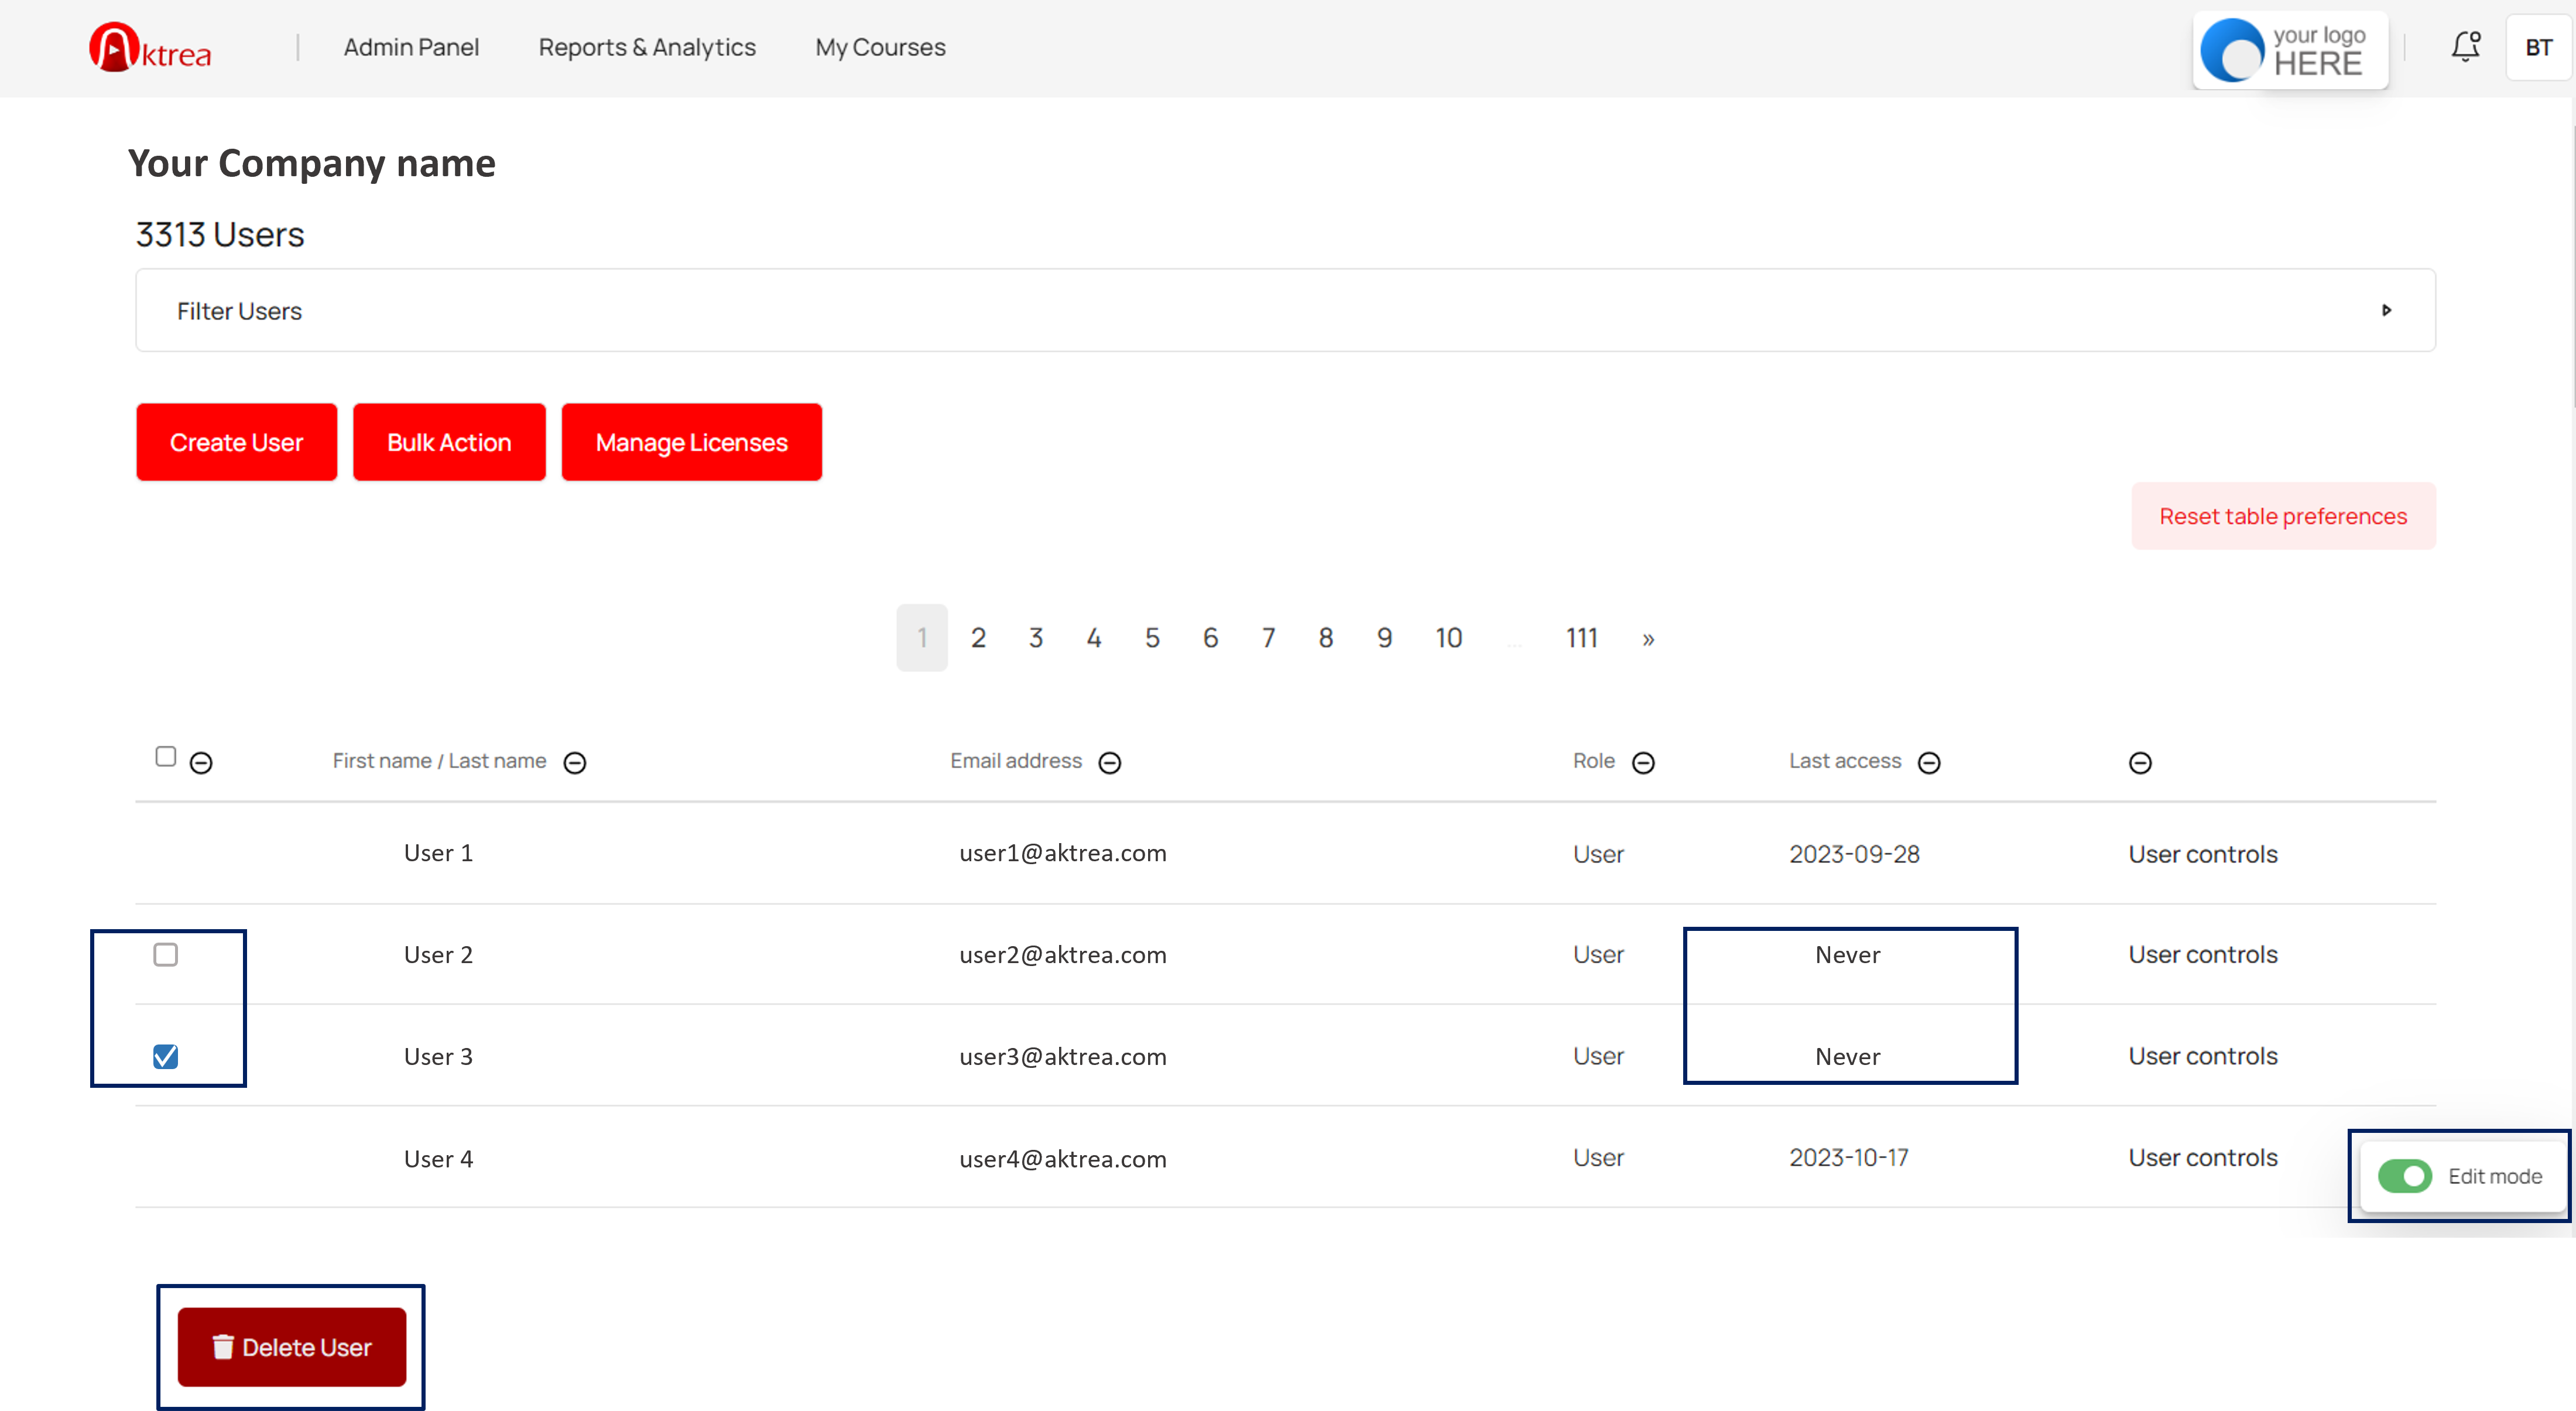
Edit Mode
Enable Edit Mode: Click on the “Edit mode” button located at the bottom right corner of the page. Delete User button will be displayed only when the Edit mode is enabled.
2
Select Users for Deletion
Select the checkbox(es) for the user accounts you want to delete. Only users who haven’t accessed the platform will have a checkbox next to their name.
3
Confirm Deletion
Click on the “Delete User” option. A confirmation prompt will likely appear. Click “OK” to confirm. Important: Once deleted, user accounts cannot be recovered. Proceed with caution.
1
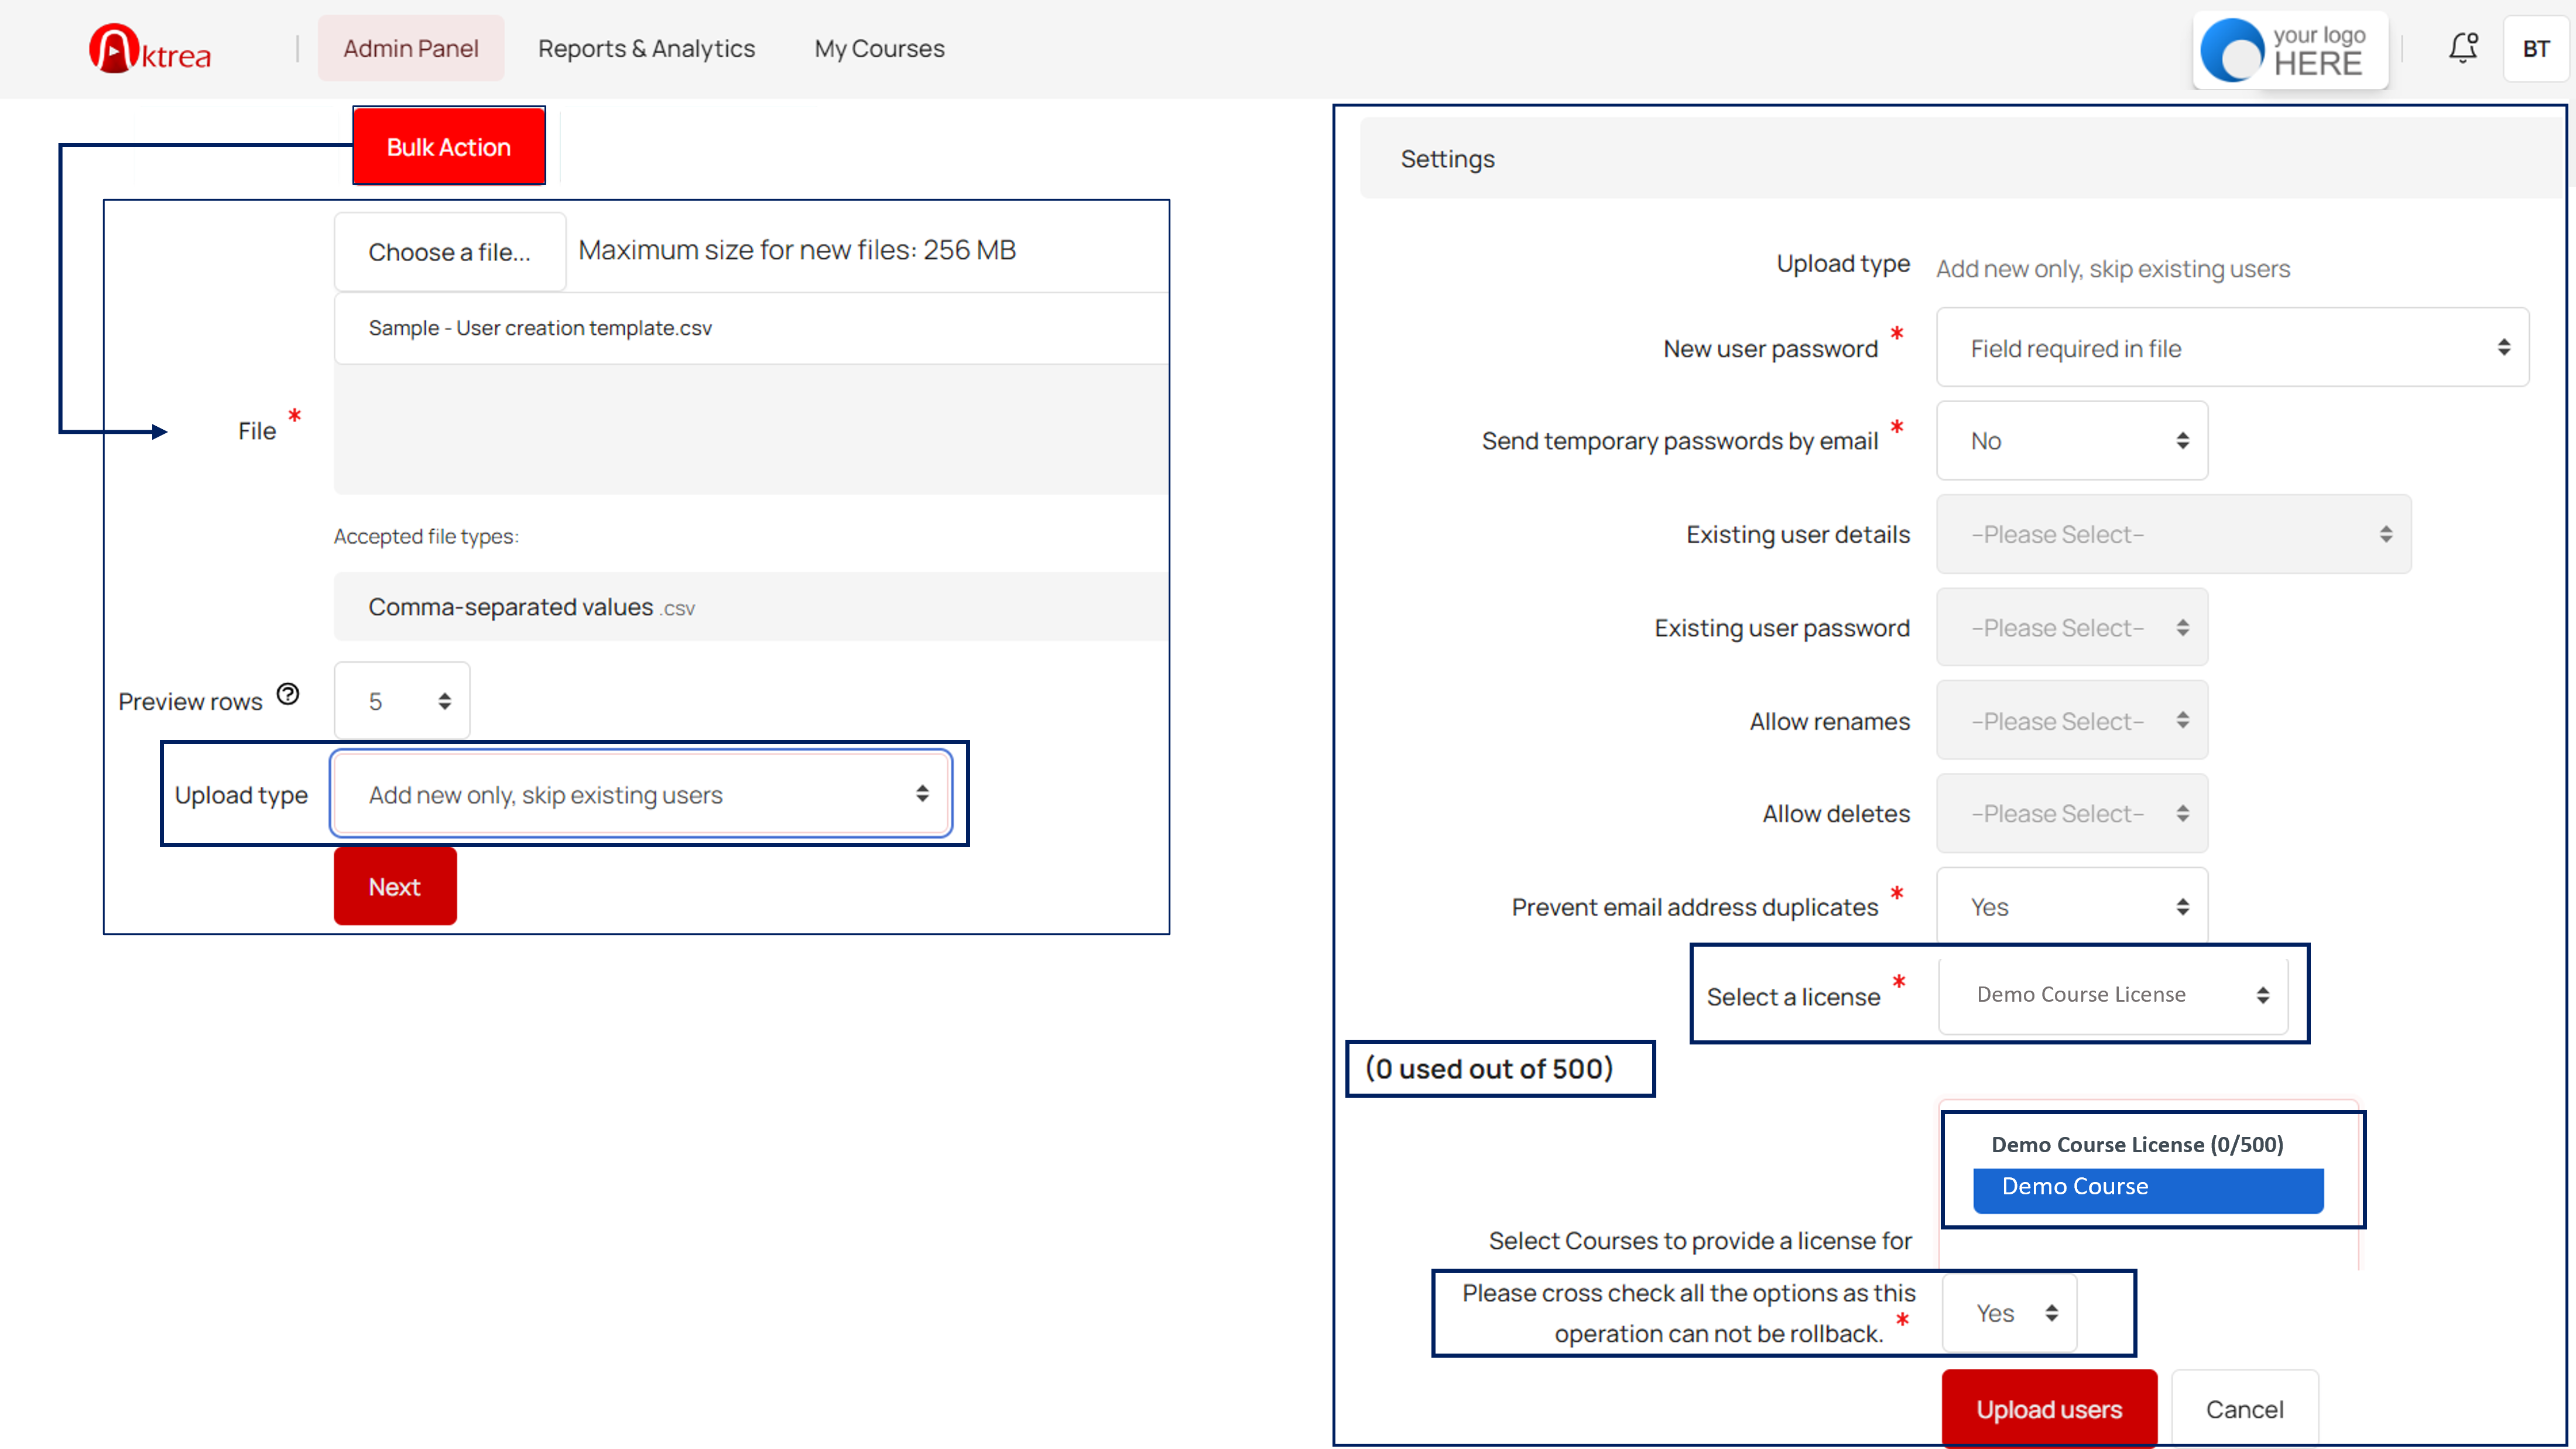
Upload
Upload the (.csv) file with users data (Not more than 300 rows). Ensure the upload type is ‘Add new only, skip existing users’ and click on Next
2
Settings
- New user password: Field required in file
- Send temporary password by email: NO
- Prevent email address duplicates: YES
If you want to send an auto-generated password via email, follow these steps:
- New user password: Create password if needed and send via email
- Send temporary password by email: Yes
3
License
Select the available license
4
Course
Select the course under the license
5
Confirm
Please cross check the above settings and select YES to proceed
6
Upload Users
Click on the “Upload Users” button to initiate the bulk user creation process.
1
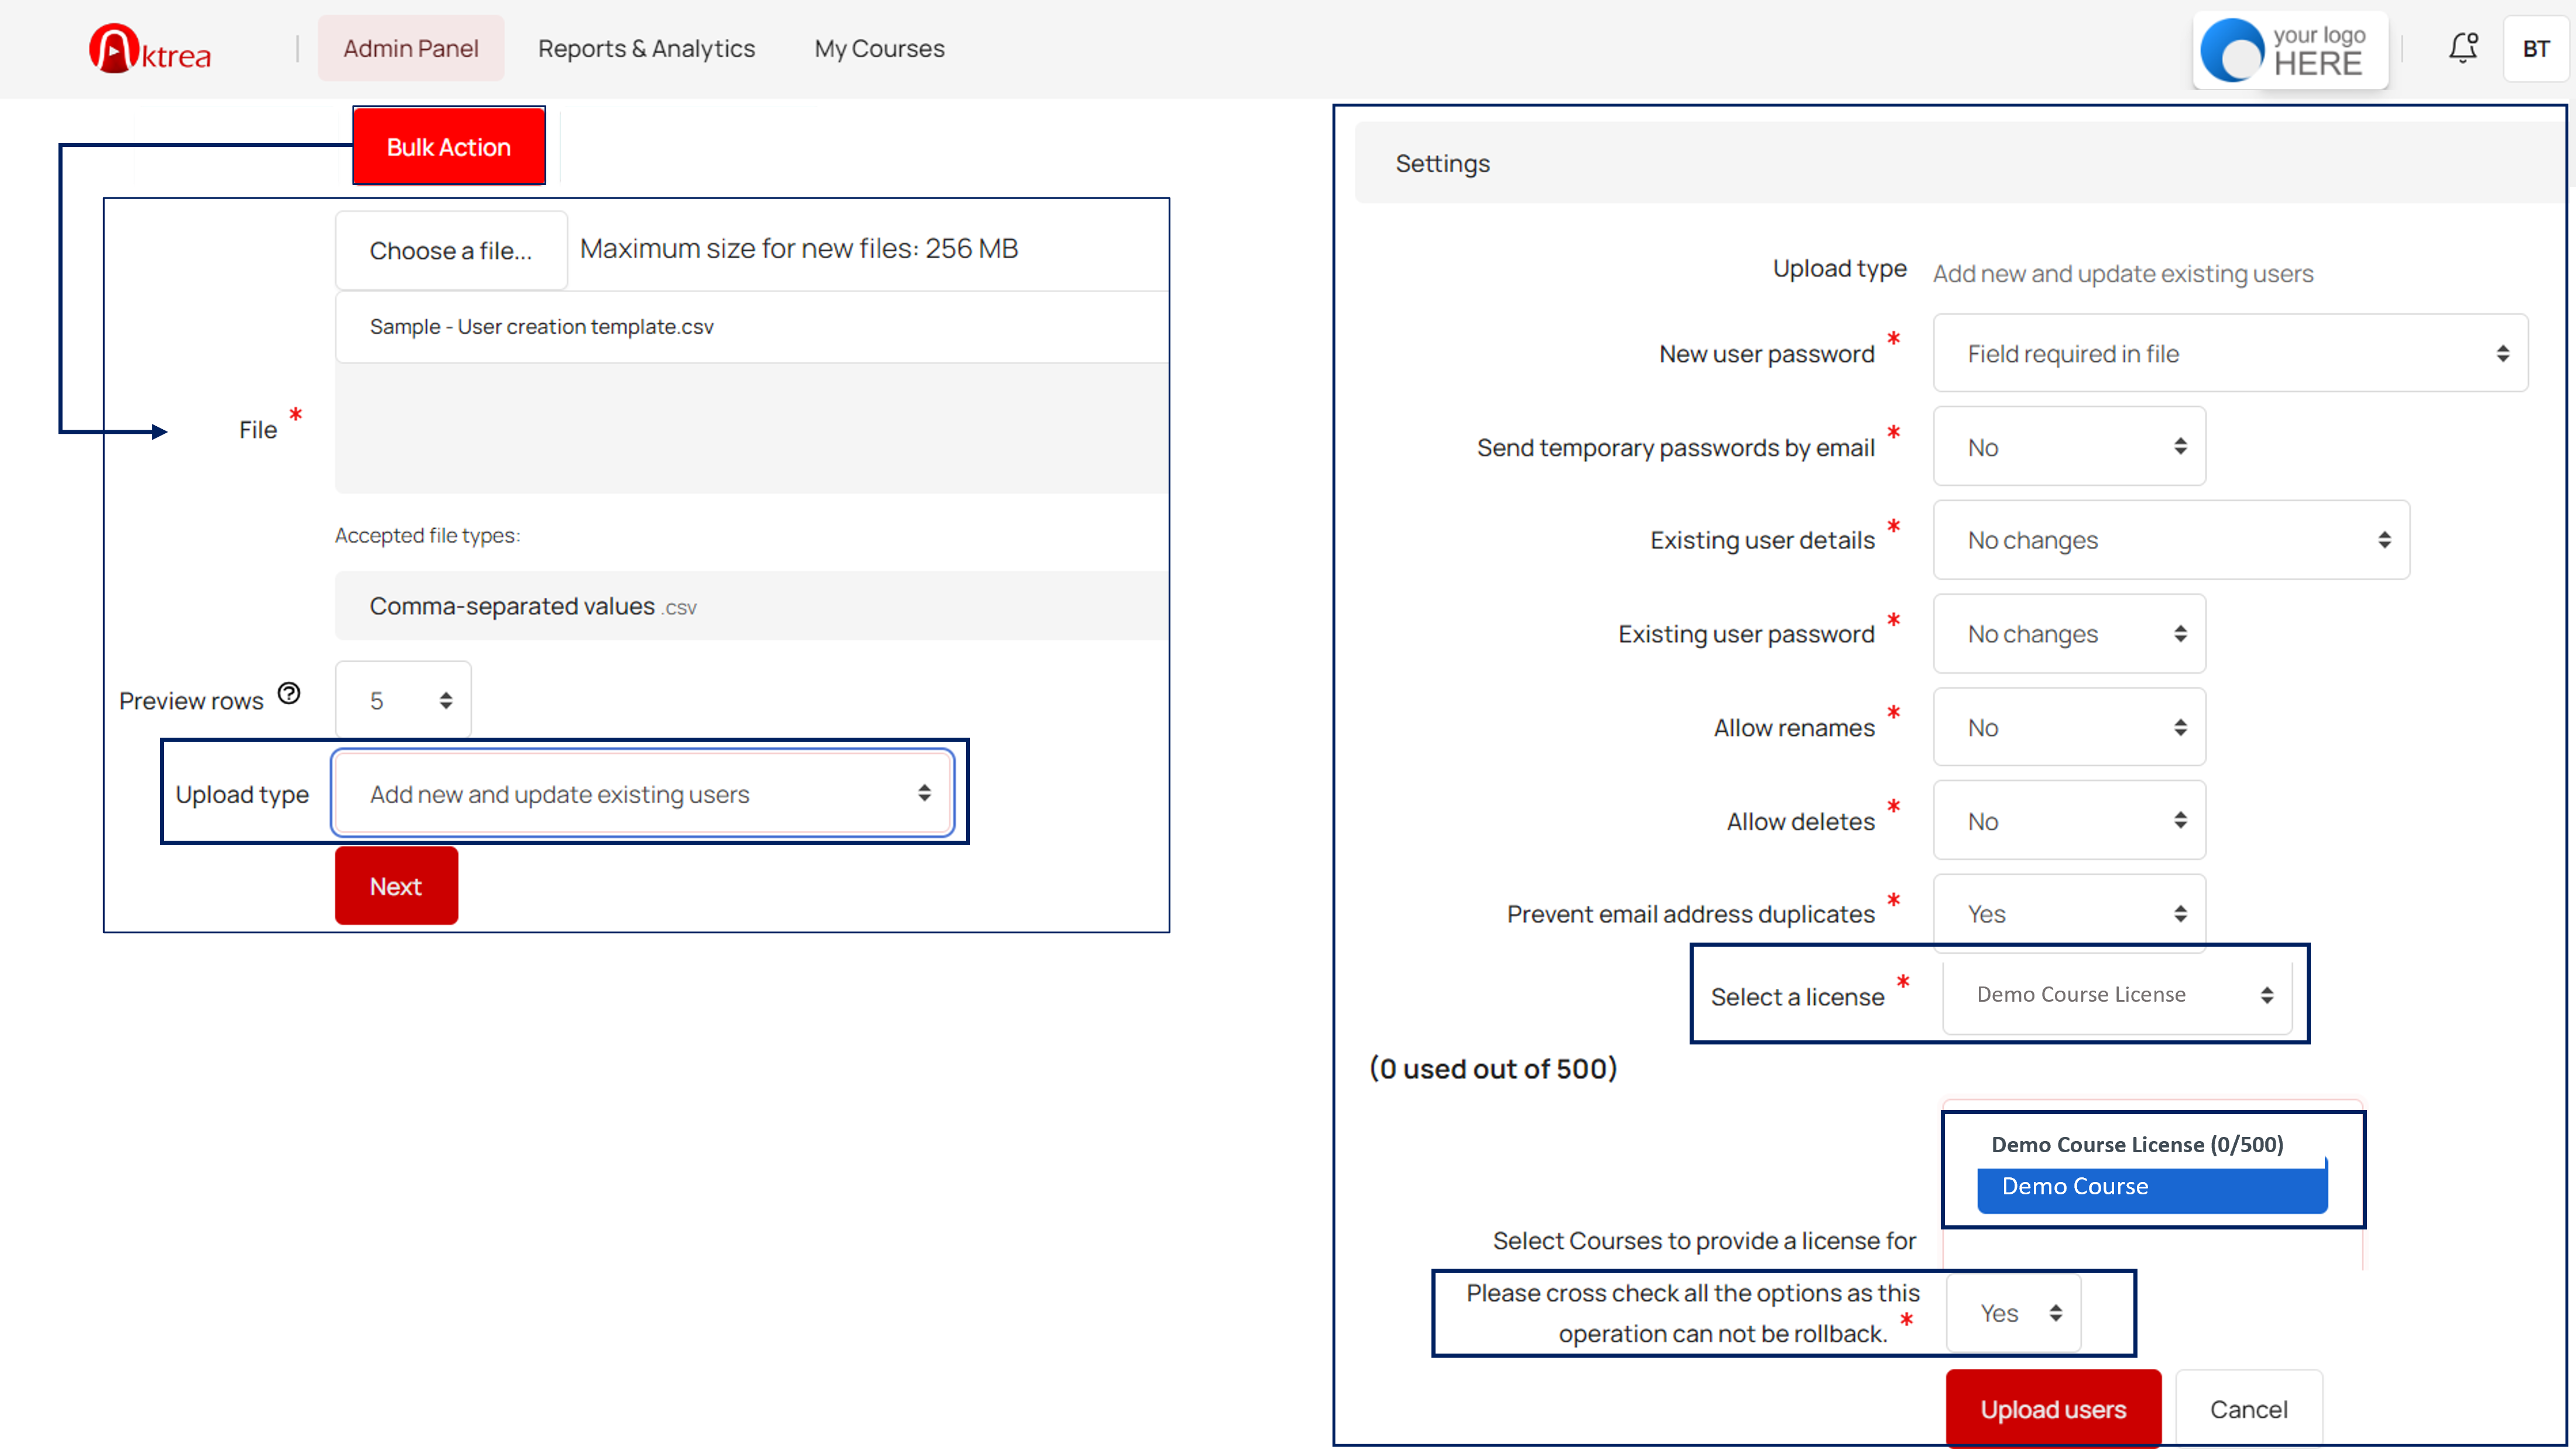
Upload
Upload the (.csv) file with users data (Not more than 300 rows)
2
Upload Type
Select the Add new and update existing users. This will help you to assign existing users to a new license in bulk along with the new users.
3
Settings
- New user password: Field required in file
- Select NO for Send temporary password by email, Existing user details, Existing user password, Allow renames & Allow delete
- Prevent email address duplicates: YES
If you want to send an auto-generated password via email, follow these steps:
- New user password: Create password if needed and send via email
- Send temporary password by email: Yes
4
License
Select the available license
5
Course
Select the course under the license
6
Confirm
Please cross check the above settings and select YES to proceed
7
Upload Users
Click on the “Upload Users” button to initiate the process.

1
Upload
Upload the (.csv) file with users data (Not more than 300 rows)
2
Upload Type
Select the Upload type: Update existing users only to update or assign existing users to a new license in bulk
3
Settings
- New user password: Field required in file
- Select NO for Send temporary password by email, Existing user details, Existing user password, Allow renames & Allow delete
- In case, if you want to modify the users details you have to select Filed required in file for the Existing user details
- Prevent email address duplicates: YES
If you want to send an auto-generated password via email, follow these steps:
- New user password: Create password if needed and send via email
- Send temporary password by email: Yes
4
License
Select the available license
5
Course
Select the course under the license
6
Confirm
Please cross check the above settings and select YES to proceed
7
Upload Users
Click on the “Upload Users” button to initiate the process.
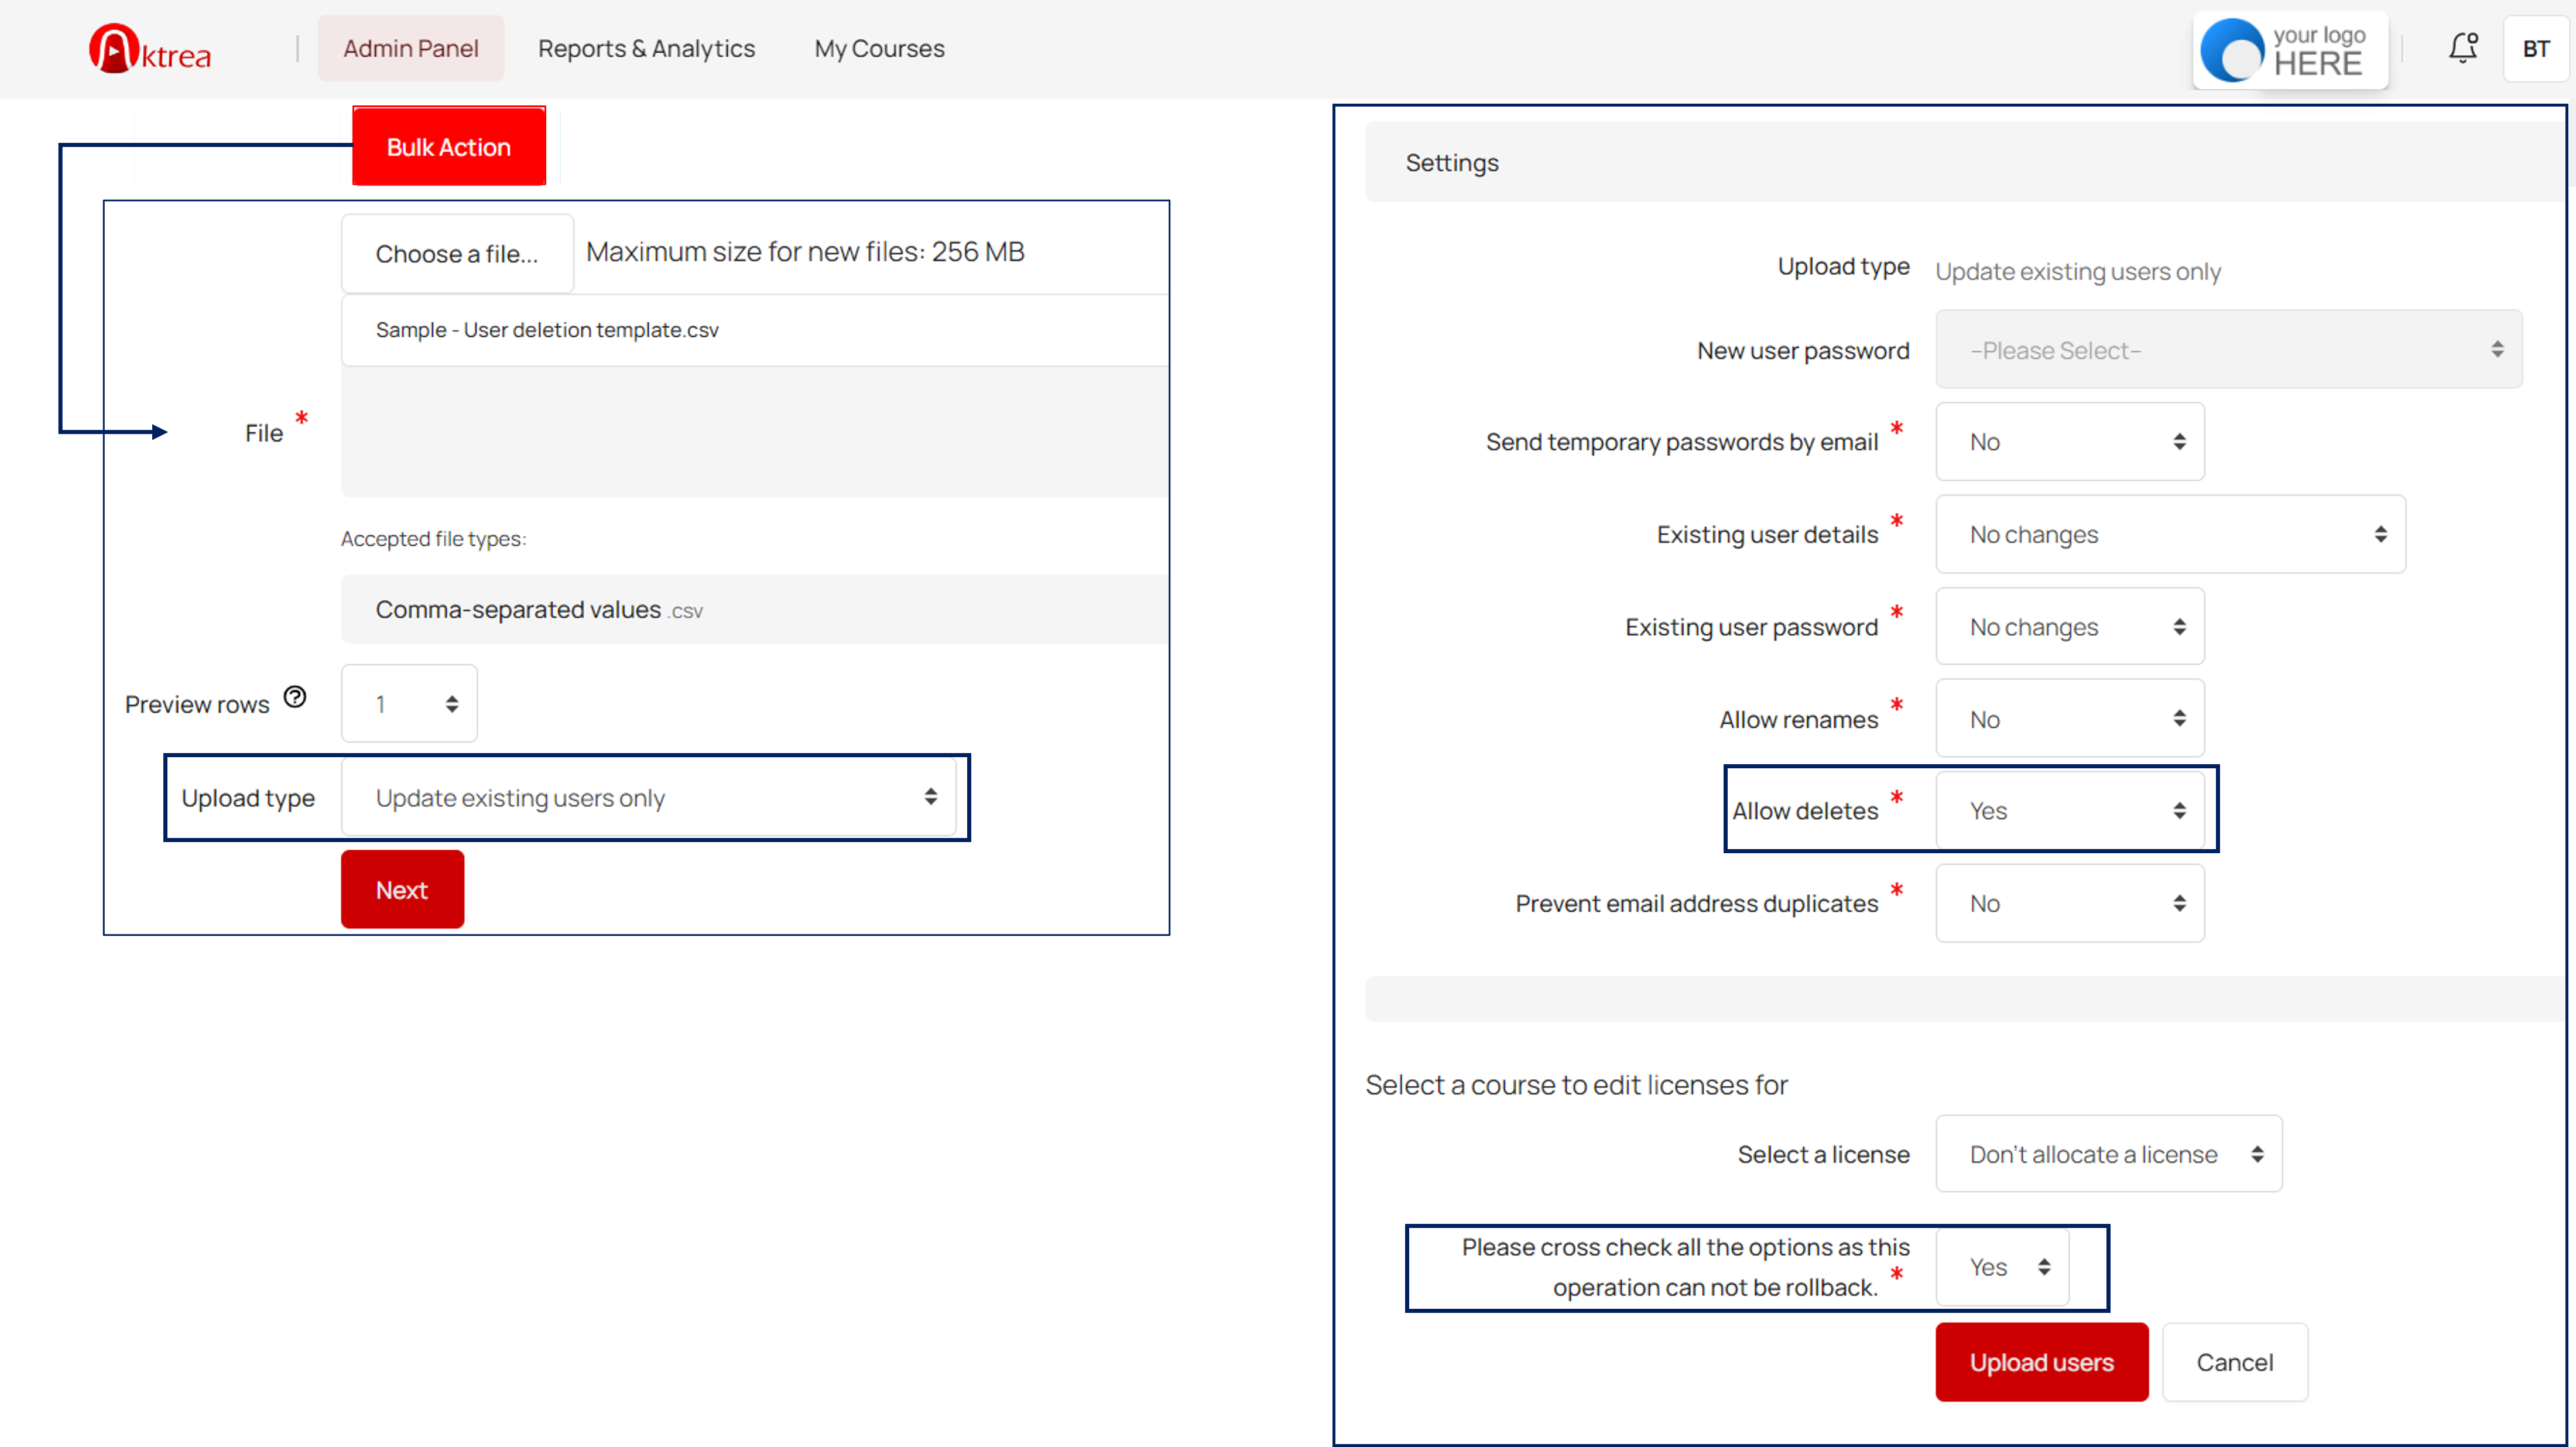
1
Upload
Upload the (.csv) file with users data with additional column ‘deleted’ filled with ‘yes’ (Not more than 300 rows)
2
Upload Type
Select the upload type to ‘Update existing users only
3
Settings
Select NO for Send temporary password by email, Existing user details, Existing user password, Allow renames & Prevent email address duplicates
4
Allow Deletes
Allow deletes: YES
5
Confirm
Please cross check the above settings and select Yes to proceed. Important: Once deleted, user accounts cannot be recovered. Proceed with caution
6
Upload Users
Click on the “Upload Users” button to initiate the deletion process.
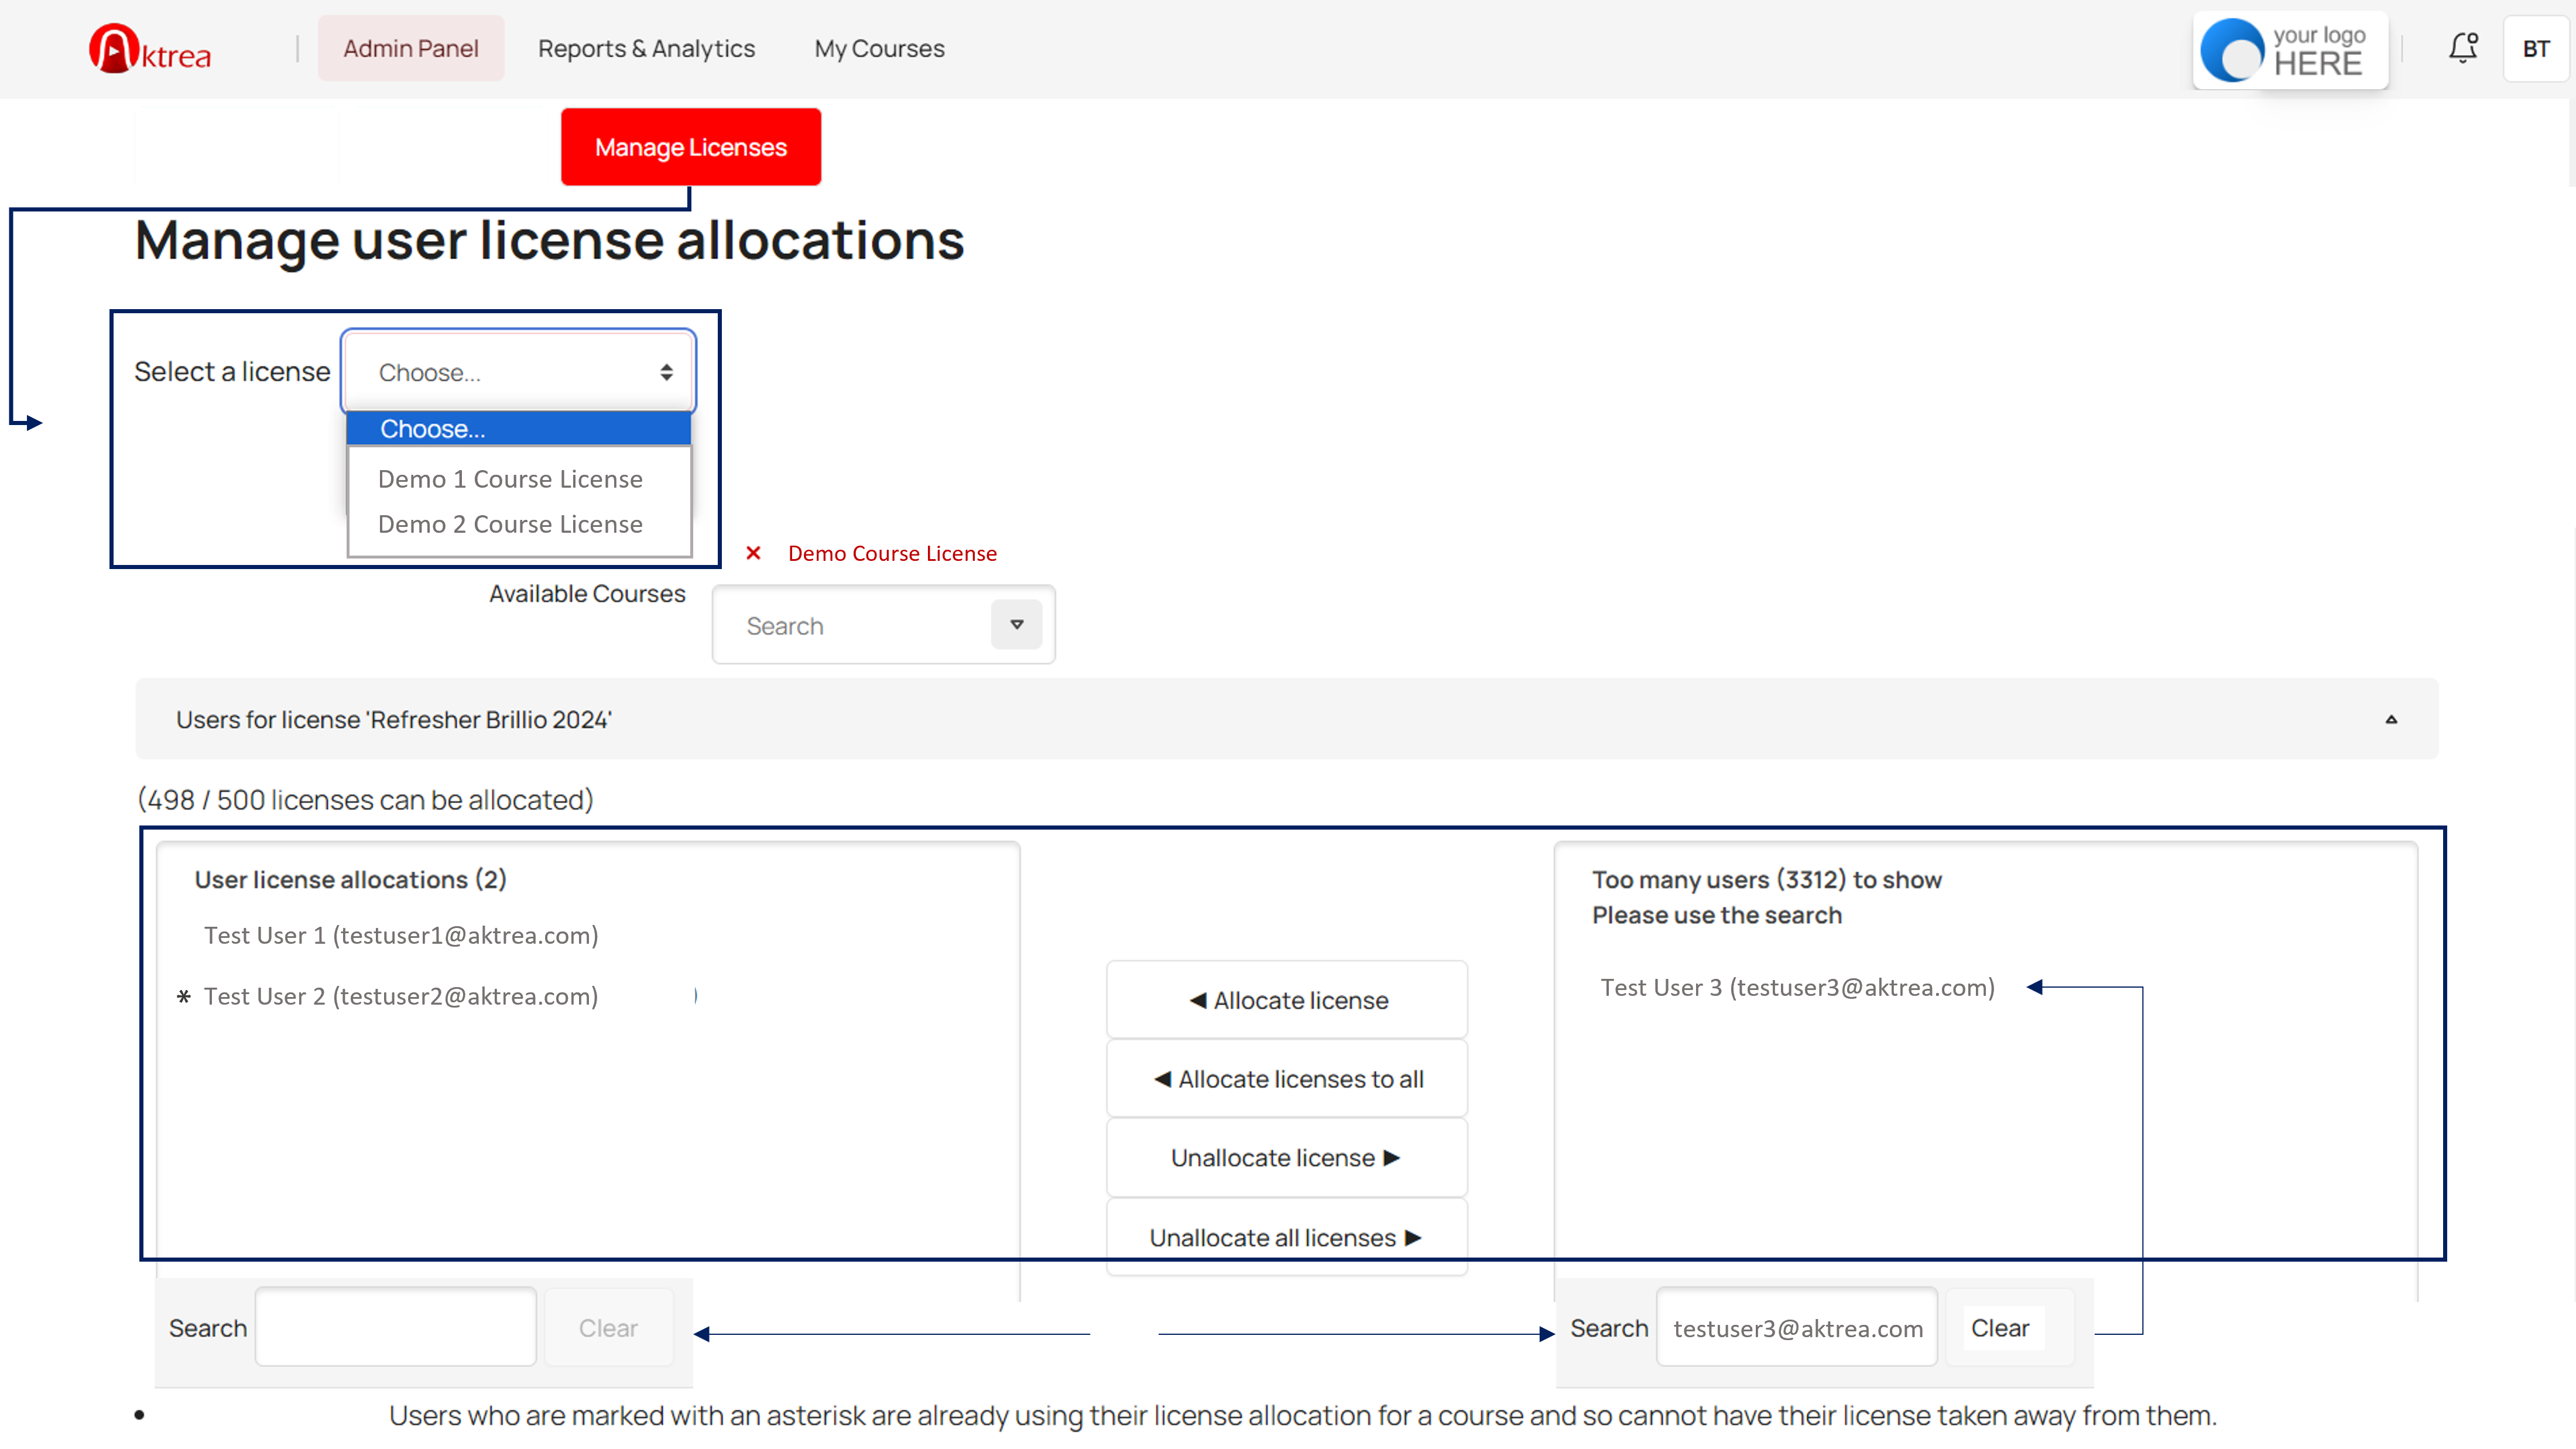
1
Select License
Choose the license from the dropdown to view and manage the users
2
License Allocation
Select the users and click on allocate or unallocate license options.
- Users on the left: These users are currently allocated.
- Users on the right: These potential users are not currently allocated.
3
Search Users
If a large number of users are displayed, you can utilize the “Search box” option to find specific users by name or email.